
 Deutsch
 Français
 日本語
 Español
 Italiano
 Русский
 繁體中文
 한국어

When manufacturers have ideas for a new product, its design no doubt looks perfect on a computer screen. However, that doesn’t mean the real part will work that perfectly. So have you ever wondered how manufacturers check that their product has no defects and is ready for full production? That’s where CNC rapid prototyping comes into the scene. It gives them a chance to see the real part, test it, and make changes if needed. If you are new to the term, all this might feel tricky. But worry not! This guide on CNC rapid prototyping will help clarify things. I will explain what CNC rapid prototyping is, its lead time, and its estimated cost. So let’s get started.
What is CNC Rapid Prototyping? An Overview
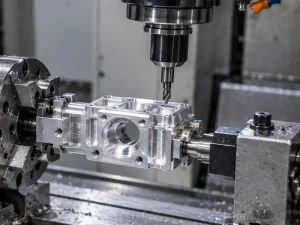
CNC rapid prototyping is a process for quickly producing a physical sample from a digital design. In this process, different CNC machines are used. These machines use computer instructions and cut material into the exact shape, design, and size. Now, this sample helps manufacturers test a part before moving to full production.
Here, the word “rapid” may confuse many beginners. Rapid does not mean that CNC parts will be made quickly. Instead, it means making a sample part before full production starts. This helps manufacturers see the real qualities and features of the part they plan to make on a large scale. Suppose you have a new machine part design for your business. The manufacturer will not produce 1,000 pieces right away; they will make a few CNC prototypes first.
You test that prototype, find any problems, make changes, and then move toward final production. That quick testing cycle is actually the “rapid” part. The best thing about prototyping is that you can make it from the same material you’ll use for the final part. This makes testing even more realistic. Suppose a manufacturer plans to produce an aluminum component. In that case, an aluminum CNC prototype will better reflect its actual features, such as weight, strength, fit, and appearance.
How CNC Rapid Prototyping Works?
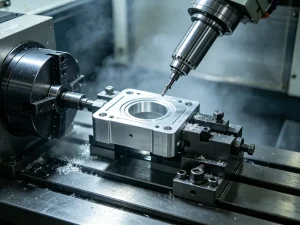
CNC rapid prototyping begins with a CAD design of the part. A CAD file shows the prototype’s exact shape and size. Manufacturers prepare and check the design to ensure it includes all the features expected in a prototype. After the digital design is ready, they choose a suitable material, CNC machine, and cutting tools.
That digital design is fed into this CNC machine. The CNC machine follows the file’s instructions and starts removing material from the workpiece. It continues cutting until it produces the required shape, design, and size. Once done, the machine stops, but the job does not end there.
The manufacturer cleans and checks this prototype. They make sure the key measurements the customer requested are correct. They remove sharp edges, polish the surface, and give a special finish if needed. The prototype is also tested against fit, size, strength, movement, or actual use. If something is wrong, the design is changed, and another prototype is made.
Common Types of CNC Machines Used for Rapid Prototyping
Remember, not every prototype is the same in design, size and shape. For this, some need cutting, some need drilling, some need simple shapes, and some need more. Because of this, manufacturers use several machines to create a prototype. Manufacturers choose the CNC machine based on the part shape, material, size, required accuracy, and features. Here is a list of common CNC machines mainly used for rapid prototyping.
- CNC Milling Machines
- CNC Turning Machines
- CNC Machining Centers
- CNC 3-Axis Machines
- CNC 4-Axis Machines
- CNC 5-Axis Machines
- CNC Swiss-Type Machines
- CNC Drilling Machines
- CNC Boring Machines
- CNC EDM Machines
CNC Rapid Prototyping Cost: What Affects Its Overall Price?
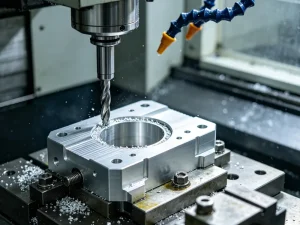
CNC rapid prototyping usually costs around $50 to $500+ per prototype. A simple part might cost around $50–$150. At the same time, a more complex part can reach $300–$500 or even more. The final price depends on the manufacturer, material, part size, design complexity, and more.
So basically, there is no fixed price for creating a CNC rapid prototype. It varies based on factors such as design complexity, material, finishes, and the manufacturer. The fixed price is what the manufacturer mentions in quotes. But what exactly affects prototype cost? Let’s discuss the major factors below.
1- Material Cost
The first thing that affects a prototype’s price is the material you choose. If you choose materials such as aluminum, mild steel, and basic plastics, they are easier on the budget. On the other hand, materials such as titanium, tool steel, or certain engineering plastics cost much more. So, it is possible that if there are two prototypes with almost the same shape, they can vary in price due to material usage. The material waste is also worth discussing. If your prototype has a complicated shape, it will waste more material. It means the manufacturer is asking you to pay for material that eventually becomes chips and waste. It increases the overall cost of the prototype.
2- Size and Complexity Of Part
Part size and its complexity are another thing that highly influences the prototype cost. For example, a small part is easier to machine than a large housing. So, even when two parts have a similar shape, the larger one will cost more. Similarly, a complex-shaped prototype with deep pockets, curved surfaces, and thin walls will cost more than a flat, simple one. Why? Manufacturers have to use different cutting tools, extra setups, or more machining time to get everything right.
3- Machining Time
Machining time is the time the CNC machine takes to make your prototype. It directly affects the prototype’s final price. Actually, manufacturers consider machine time when preparing a quote. A part that takes 30 minutes to machine will cost less than one that requires the machine to run for several hours. The part’s shape has a major effect on machining time. A basic, flat part with easy-to-cut surfaces is finished quickly. Right? But if there are deep pockets, small holes, or curved areas, they will take more cutting passes. So basically, the longer the machine works, the higher the machining cost becomes.
4- Tolerances
A tolerance is the allowable deviation from a part’s exact measurement. It tells the manufacturer how much a measurement can vary from the design shown in your design. For example, if a hole needs to be a specific size, say 10 mm, but you allow a very small difference in that size. That’s what we call tolerance. The tighter the tolerance, the more carefully manufacturers make the part. So, very tight tolerances automatically take more time and skill. The manufacturer uses slower cutting, better tools, extra machining steps, or detailed inspection. This adds to the overall cost. For this reason, do not ask for extremely tight tolerances unless the part really needs them.
5- Surface Finish Options
Surface finish is another factor that changes prototype cost. A machined surface is usually cheaper. You can use that part after machining, with no need for extra finishing work. But if you specifically want the prototype to look very smooth or polished, the manufacturer will spend more time finishing it. For some prototypes, they also use special finishes such as anodizing, powder coating, painting, or bead blasting. These extra processes are done after the main CNC machining is finished. Each extra step needs labor, processing time, and material cost. The final price therefore goes on increasing.
6- Quantity of Prototypes
If you order only one CNC prototype, it is often surprisingly expensive. Why? The manufacturer still has to prepare the entire setup. They set up the machine, set the tools, load the material, and program the job even if you only want one part. That means you also pay for the preparation along with the actual machining. Now imagine you need 30 identical prototypes. The manufacturer will use the same setup to make the whole batch. You don’t need to prepare everything from scratch for every part. So, as quantity goes up, price goes down.
What Is the Lead Time for Rapid Prototyping
Lead time for CNC prototyping is the total time needed to complete a prototype from the start of the order to the finished part. It includes time for design review, material preparation, machine setup, CNC machining, inspection, and finishing. In other words, it tells you how long you have to wait before your prototype is ready and delivered.
Remember, lead time is never the same as machining time. Machining time includes the time only to make the prototype using a CNC machine. A machine may need only a few hours to cut a part. That doesn’t mean you will receive your order then. However, lead time is different. It starts when a manufacturer reviews and prepares the design. Then it includes machine setup, machining, inspection, and finishing.
This time ends when you finally receive your prototype. The lead time is never fixed. It might range from a few hours to a few weeks. That totally depends on the design complexity, the part, material, and machining requirements. If the design is simple, it will take less time to prepare, and you will receive it sooner. However, a complex-geometry part will take longer and require more machining processes. That’s why it is best to ask about the full lead time, not just how long the CNC machine will run.
Useful Design Tips for CNC Rapid Prototyping
A good prototype isn’t just the one that looks good. It’s the one that works with a cutting tool and a CNC machine, reduces cost, and matches your final product. Small changes can make a part easier to machine, reduce work, and lower the final cost. Here are those tips that you must consider before ordering a prototype.
-
Avoid Unnecessarily Thin Walls
Thin walls no doubt look fine in a digital design. However, they become difficult to machine in the real world. A very thin section can bend, vibrate, or even break while the cutting tool is working on it. This is especially a concern when the part is made from a softer material. However, that does not mean the walls should be very thick. Instead, they should be just thick enough to do the job, reducing material waste and unnecessary work.
-
Use Standard Hole Sizes When Possible
There is usually no good reason to make every hole a special size. Standard drill sizes are easier for manufacturers to work with. This is because the required tools are commonly available. This makes the machining process simpler and avoids the need for special tooling. So if that hole is meant to fit standard components, then use a standard hole size.
-
Avoid Very Deep Pockets
Deep pockets make CNC machining much harder than it first appears. The cutting tool has to reach far down into the part. This requires a longer tool, which is more likely to bend or vibrate during cutting. There is also more material to remove, so deep pockets increase machining time. If extra depth isn’t important, avoid deep pockets to make the prototype easier.
-
Add Fillets to Internal Corners
A common mistake in CNC designs is to expect a perfectly sharp corner inside a pocket. Most CNC cutting tools are round. So they naturally leave a small radius at an internal corner. Forcing a perfectly square inside corner requires a different manufacturing method. This can increase the prototype cost. So in that case, it is best to add fillets, which are small rounded edges. It gives the cutting tool enough room to move through the corner naturally. As a result, it becomes easier to machine and avoids extra work.
-
Do Not Over-Specify Tolerances
Lastly, you do not need every part of your prototype to be perfectly exact. Some areas need very accurate measurements, but others work fine with a small amount of difference. So if you ask for very tight measurements everywhere, it will make the prototype harder. It can also make prototyping very expensive to machine.
What is CNC Machining Service for Rapid Prototypes?
A CNC machining service for rapid prototypes is a service where a manufacturer makes sample parts from your digital design. You send the design, choose the material, and explain what you need the prototype for. The manufacturer then cuts the part from a solid block and creates the exact prototype you requested.
Now you can check this finished prototype for its size, shape, fit, and function before full production. Basically, not everyone has CNC machines and the skills to operate them. In that case, many businesses ask manufacturers to prepare a prototype for them. They send CAD files to the manufacturer, and the manufacturer handles the machining. First, manufacturers check what type of machining process a prototype needs.
Then they choose the operation, like CNC milling, turning, or another suitable machine. They can also handle finishing and inspection if you need them. This way, you can find design problems before you spend money on full production. A good manufacturer sometimes suggests simple changes to holes, walls, corners, or tolerances. This makes the part easier to produce. These services also save time, reduce costs, and help you get a prototype ready for real testing.
Conclusion
In short, CNC rapid prototyping lets you test a real part before committing to full production. That makes a big difference. A prototype basically shows problems that are easy to miss on a computer screen. You can check the size, fit, strength, and overall function before making a large batch. However, prototyping has no fixed cost or lead time. These can vary depending on design complexity, part size, material, and other factors discussed in this guide. The good news is that you can control many of these factors through better design choices. Keep the design practical. Avoid features that do not serve a real purpose. Use tight tolerances only where they are needed.